Synology Best Practices for Mac-Based Businesses: Security, Settings and 10GbE (2026 Guide)
How to choose and set up a Synology RackStation for a Mac business in 2026: rack vs desktop, hardening, SMB for macOS, Time Machine, and 10GbE.

Stabilise
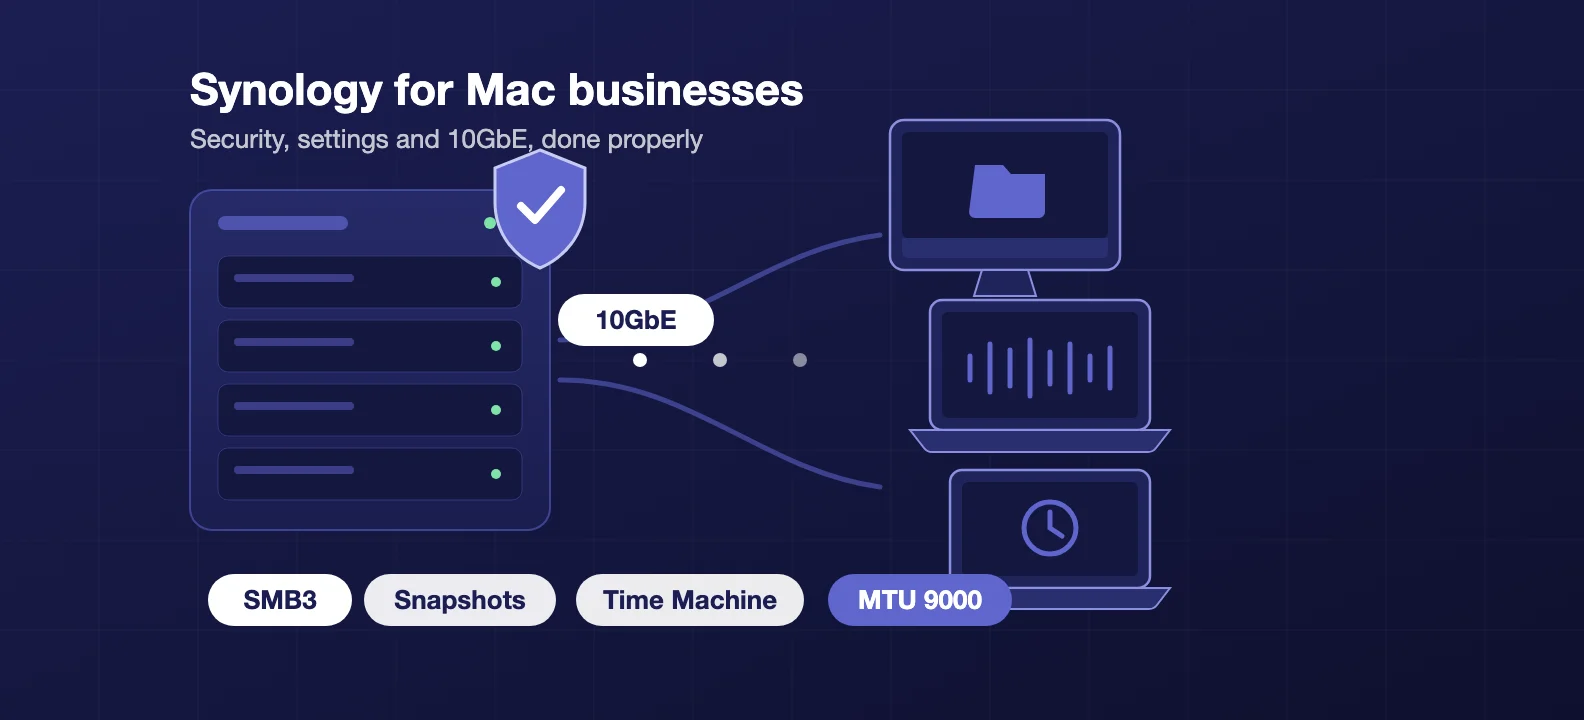
Most Synology guidance on the internet is written for home users, and almost all of it assumes Windows. If you run a Mac-based business, you inherit a set of problems those guides never mention: Finder search that silently does nothing on network shares, .DS_Store files breeding across every folder, Time Machine backups that fail with cryptic errors, and 10GbE networks that benchmark beautifully and then transfer files at a tenth of the speed.
We deploy and manage Synology NAS units for Mac-first companies across London, as a Mac-specialist provider rather than a Windows generalist, so this is the guide we wished existed. It runs from first-day basics to the advanced networking most articles skip, and every section ends with a step-by-step you can follow directly. Everything here reflects DSM 7.3/7.4 and macOS 26 Tahoe as of July 2026.
One framing note before we start: a NAS on your network is a server, and it holds the most valuable data in your business. Treat its setup with the same seriousness you would treat a cloud migration, because attackers certainly do.
In March 2026 Synology patched a critical 9.8-severity remote code execution flaw in DSM's telnet service, and in 2024 researchers demonstrated a zero-click exploit against Synology Photos with an estimated one to two million devices exposed to the internet. The gap between a hardened NAS and a default one is enormous, and it is mostly a matter of an afternoon's configuration.
Buying the right box: rack first for most businesses
For most businesses we deploy for, the right Synology is a rackmount RackStation, not a desktop DiskStation. If you have a comms room, or even a small wall-mounted cabinet, rack is the sensible default: built-in fast networking, room to grow, redundant power on the models that offer it, and a box that lives somewhere it is allowed to be loud. Desktop DiskStations are the exception, for offices with genuinely nowhere to rack a unit.
RackStation: the business default
RackStations split into two tiers, and the split maps neatly onto budget and workload.
RS Plus is the business entry tier. These run AMD Ryzen CPUs with ECC memory and scale from 4 bays up to 16. The 4-bay RS422+ and RS822+ start on 1GbE and take a 10GbE or 25GbE card; from the 12-bay RS2423+ up, 10GbE is built in, and the 16-bay RS2825RP+ (2025) is also 25GbE-ready.
For resilience, look at the RP variants (RS822RP+, RS1221RP+, RS2423RP+II, RS2825RP+), which add redundant, hot-swap power so a dead PSU does not take the NAS down. All of them take RX expansion shelves, so a 12-bay unit grows to 24 drives without replacing the head unit.
RS xs and xs+ are the performance tier. The RS1626xs+ (a short-depth 1U 4-bay), RS3621xs+, RS3626xs, RS4826xs+ and RS6426xs+ all ship dual 10GbE built in and take PCIe cards for 25GbE. Head-unit bay counts run 4 to 16, and expansion scales the top models to 48 or 64 drives. This is the tier for post houses, render pipelines, and anyone whose working storage is the business.
Two rack realities worth planning for. Rack gear is loud, which is the point: it belongs in a comms room away from desks, which is exactly why it suits a business better than a desktop unit humming next to someone's monitor. And check rack depth before ordering, because full 2U RackStations are deep and will not fit a shallow wall cabinet. That is what the short-depth 1U models like the RS1626xs+ are for.
As with the desktop range, verify the specific model's spec sheet before buying, not the product family. Synology shifts which models carry built-in 10GbE between generations.
No rack? The desktop path (and the DS925+ trap)
If you have nowhere to rack a unit, a desktop Plus model is fine, with one trap to avoid.
If you want 10GbE, the newest 4-bay is the wrong NAS. The DS925+ is Synology's default small-business desktop pick, but it dropped the 10GbE network upgrade slot its predecessor the DS923+ had. There is no path to 10GbE on a DS925+, full stop. A Mac team on a desktop unit that wants fast networking starts at the DS1525+ (5-bay, takes Synology's E10G22-T1-Mini module in a dedicated slot) or the DS1825+ (8-bay, with a PCIe slot for a full 10GbE or 25GbE card). If you do not need 10GbE, the DS925+ is a fine box.
On drives, the 2025 lockdown saga is mostly resolved. In April 2025 Synology blocked storage pool creation with non-validated third-party drives on its 2025 Plus models, and the backlash was loud enough that DSM 7.3 (October 2025) reversed it. Third-party 3.5-inch hard drives and 2.5-inch SATA SSDs work again, with an "unverified" label and reduced health analytics. The reversal does not cover M.2 NVMe: storage pools on NVMe still require drives from Synology's compatibility list, so budget for listed NVMe if you plan an all-flash working tier.
Sizing is simpler than vendors make it. For a team of 5 to 25 Macs doing office work, a 12-bay RS Plus RackStation (or a 4-to-8-bay desktop where there is no rack) with NAS-rated drives (Synology HAT, Seagate IronWolf, WD Red Plus) is plenty. For video, photography, or audio teams, the network and the drive count matter more than the CPU, which is why the tier choice above is the decisive spec.
Step by step: speccing the NAS
- Rack or no rack? With a comms room or cabinet, choose a RackStation: RS Plus for office and general business use, RS xs/xs+ for media and heavy workloads. Desktop DiskStation only if there is nowhere to rack one.
- Decide on 10GbE. On RackStations it is built in from the 12-bay RS Plus up and across the whole xs range. On desktop that means DS1525+ or DS1825+, never the DS925+.
- If uptime is critical, choose an RP (redundant-power) model, and consider two units for High Availability (covered later).
- Fill at least 4 bays with NAS-rated drives. More smaller drives usually beats fewer huge ones for speed and rebuild risk, and RX expansion shelves add bays later without a forklift upgrade.
- If buying a 2025-or-newer model with third-party drives, expect "unverified" warnings. They are cosmetic for HDDs and SATA SSDs.
- Only buy M.2 NVMe drives that appear on Synology's compatibility list for your model.
- Buy a second Synology (or budget for cloud) at the same time as a backup target. "We'll add backup later" is how businesses lose data.
First-day setup: the decisions that are hard to change later
Choose Btrfs and SHR when you create the volume. Btrfs gives you data checksums, self-healing on redundant arrays, and snapshots, which are the foundation of the ransomware protection covered later. SHR (Synology Hybrid RAID) tolerates one drive failure and handles mixed drive sizes gracefully; use SHR-2 on arrays of five or more drives. The file system cannot be changed without rebuilding the volume, so get this right on day one.
(One exception worth knowing: if the NAS will also run Surveillance Station for cameras, Synology's guidance prefers ext4 for that workload. Keep cameras on a separate volume or a separate box.)
Skip QuickConnect during the setup wizard. You can add remote access properly later (we recommend Tailscale, covered in the security section). The wizard makes QuickConnect feel mandatory; it is not.
DSM 7 already handles the admin account. Fresh installs force you to create a named administrator and disable the default "admin" account automatically. Older guides tell you to disable admin as step one; on a new NAS your job is just to verify it shows as disabled in Control Panel > User & Group. If you migrated from an older system, check and disable it manually.
Know which DSM branch you are on. As of July 2026 there are two current lines: DSM 7.4 (released 16 June 2026, still rolling out through the summer) and DSM 7.3.2, which is the long-term support branch with security fixes committed to October 2027. A new NAS may arrive with either. Both are fine; what matters is Control Panel > Update & Restore set to install important updates automatically. Synology shipped over 50 proactive security updates in the past year, and unpatched NAS units are exactly what gets exploited.
Structure shares by team, not one big folder. Permissions on Synology are cleanest at the shared-folder level. Create per-team shares (Finance, Projects, Studio) rather than one giant share with per-subfolder permissions. Enable the Recycle Bin on every share, and add a Task Scheduler job to purge recycle bin contents older than 30 days so deleted files do not accumulate forever.
Permissions go on groups, never users. Create groups first (finance, production, everyone), assign share permissions to groups, then drop users into groups. It is the difference between onboarding a new hire in one step and auditing forty individual permission entries a year from now.
A note on directory services, because Mac businesses ask: do not bind your Macs to a directory. Apple itself steers organisations away from directory binding, and Synology's Directory Server is a Windows-oriented Samba Active Directory. For a small Mac shop, local DSM users and groups, named to match your identity provider (Google Workspace, Entra ID, Okta), is the honest, boring, reliable answer. DSM 7.2+ supports OIDC single sign-on for the web interface if you want the login tidied up, but SMB file access still maps to DSM accounts underneath.
Give the NAS a fixed address, wired. The NAS plugs into your core switch over Ethernet, never Wi-Fi, with a DHCP reservation (or static IP outside the DHCP pool) so its address never changes underneath your Macs' mounted shares.
Step by step: day one
- Run the wizard: create your named admin account, skip QuickConnect, skip the Synology account (you can add one later for update notifications).
- Verify the default "admin" account is disabled: Control Panel > User & Group.
- Storage Manager: create an SHR storage pool, then a Btrfs volume.
- Control Panel > Update & Restore: enable automatic installation of important updates, scheduled out of hours.
- Create groups, then users, then per-team shared folders with Recycle Bin enabled.
- Task Scheduler: add a monthly "Empty Recycle Bin" task with 30-day retention.
- Give the NAS a DHCP reservation on your router or firewall.
- Control Panel > Notification: configure email (and push via Synology account if you added one), then send a test. A dead drive you never hear about is a second dead drive waiting to happen.
Security hardening: an afternoon that pays for itself
The recent CVE record justifies taking this seriously. Beyond the March 2026 telnet flaw (CVE-2026-32746, CVSS 9.8, patched across DSM 7.2, 7.3 and 7.4), the 2024 "RISK:STATION" vulnerability in Synology Photos was a zero-click remote code execution bug demonstrated at Pwn2Own, with researchers estimating one to two million exposed devices. Neither has been confirmed as exploited in the wild, but that is the wrong comfort to take: the lesson is that critical flaws in NAS software are found regularly, and the fix ships before most owners install it.
Here is our hardening baseline for every business Synology we manage, and it pairs with the Mac security baselines we apply to the Macs themselves.
Enforce 2FA for every account. Control Panel > Security > Account lets you enforce two-factor authentication for all users or specific groups. Enforce it for everyone, not just admins. Synology's Secure SignIn app gives one-tap approval, and hardware keys (including Touch ID on Macs, via Safari) work through the FIDO2 option. DSM also enables Adaptive MFA by default for administrators without 2FA, but do not rely on the fallback; enforce the real thing.
Turn on the brute-force protections. Control Panel > Security > Protection: enable Auto Block (block an IP after, say, 5 failed logins within 5 minutes) and enable DoS protection on your LAN interface. Under the Account tab, enable Account Protection as well, which locks accounts against attacks from untrusted clients even when the attacker rotates IPs.
Enable the firewall, and understand its default. Control Panel > Security > Firewall. A subtle trap: switching the firewall on with no rules allows everything. Create a rule allowing your LAN subnet, a rule allowing your VPN range if you use one, then set the default action to deny. If the business only operates from the UK, a geo-block rule denying everything else costs nothing and removes a lot of noise.
Fix the web interface. Control Panel > Login Portal > DSM tab (this moved from Network settings in DSM 6, which still confuses guides): move the default ports 5000/5001 to a high, non-obvious pair. We use five-digit ports well away from the defaults, not 5002; every automated scanner on the internet knows Synology's numbers, and moving well clear of them takes your NAS out of the drive-by sweeps. Then tick "Automatically redirect HTTP connections to HTTPS", and enable HSTS. Then install a proper certificate: Control Panel > Security > Certificate has built-in Let's Encrypt support. The one catch is that Let's Encrypt's HTTP-01 validation needs port 80 reachable from the internet during issuance; if you will not open that even briefly, use a DNS-validated wildcard certificate instead.
Disable what you do not use. SSH and Telnet are off by default in DSM 7; leave them off (and never enable Telnet, which is where that 9.8 CVE lived). Disable AFP (more on that below), and leave NFS, FTP, SNMP and rsync off unless something specifically needs them. Also disable UPnP port forwarding on your router: a NAS should never be punching its own holes in your firewall.
Remote access: use Tailscale, not port forwarding, and probably not QuickConnect. Being fair to QuickConnect: it is a relay, opens no inbound ports, and is meaningfully safer than exposing DSM to the internet directly. But it still presents your DSM login page through Synology's infrastructure, guarded by nothing more than your credentials and 2FA.
The cleaner business posture is Tailscale, which has an official package in Package Center: it builds a WireGuard-based private network between the NAS and your team's Macs, exposes nothing publicly, and takes about ten minutes. (Synology's own VPN Server package still has no WireGuard option, so Tailscale fills that gap too.) Whatever you choose, never forward ports 5000/5001 from the internet to your NAS.
Run Security Advisor monthly. It is built into DSM and catches drift: weak passwords, new services, missing updates. Schedule it and read the report.
This section is also your Cyber Essentials work. If your business holds or is chasing Cyber Essentials (or fills in cyber insurance questionnaires), a NAS is in scope, and this baseline covers four of the five CE control themes: firewalls, secure configuration, user access control with MFA, and security update management. The snapshot and off-site backup stack in the next sections is what insurers mean when they ask about ransomware recovery. We are Cyber Essentials Plus certified ourselves, and a NAS configured to this baseline does not raise assessor questions.
Step by step: hardening checklist
- Control Panel > Security > Account: enforce 2FA for all users; enable Account Protection.
- Control Panel > Security > Protection: enable Auto Block and DoS protection.
- Control Panel > Security > Firewall: allow LAN and VPN subnets, then default-deny. Add a UK-only geo rule if appropriate.
- Control Panel > Login Portal > DSM: move ports 5000/5001 to high five-digit ports, force HTTPS redirect, enable HSTS.
- Control Panel > Security > Certificate: issue a Let's Encrypt certificate and set it as default.
- Control Panel > File Services: disable AFP. Control Panel > Terminal & SNMP: confirm SSH and Telnet are off.
- Install Tailscale from Package Center for remote access; remove any QuickConnect or port forwarding you no longer need.
- Open Security Advisor, run a scan, and schedule it monthly alongside a calendar reminder to skim Synology's security advisories.
File sharing for Macs: SMB done properly
AFP is dead; be precise about how dead. Apple removed the AFP server from macOS in Big Sur, and deprecated the AFP client in macOS 15.5 with a plain statement that it will be removed in a future version. It still functions in macOS 26 Tahoe, and DSM still ships an AFP service, but Synology's own documentation says to disable AFP and use SMB for Macs. So: disable AFP on the NAS, standardise on SMB3, and if any workflow still touches AFP, migrating it is now a scheduled task rather than a debate.
The SMB settings that matter for Mac fleets all live in Control Panel > File Services > SMB, with the interesting ones behind the Advanced Settings button.
Set the protocol floor and ceiling. Maximum protocol SMB3, minimum SMB2. Nothing on a modern network needs SMB1, and leaving it available is a security hole.
Kill .DS_Store pollution with veto files. In Advanced Settings, the veto files field accepts a pattern list; enter /.DS_Store/._*/ to stop Macs writing their metadata droppings onto shares (Windows users and sync tools will thank you).
Two gotchas nobody mentions. First, veto only affects new files: existing .DS_Store files become invisible rather than deleted, which can look alarmingly like data loss, so clean up existing dot-files first. Second, every filename on the share is checked against the veto list, so keep the list short or you will slow down the very folder browsing you were trying to fix.
Leave signing on auto, and do not force encryption casually. Older Mac performance guides tell you to disable SMB signing for speed. As of macOS 26 that advice can break mounts entirely (see the Time Machine section below); leave server signing on Auto. Transport encryption is available and works, but forcing it costs a large slice of throughput, so reserve "force" for genuinely sensitive shares and let clients negotiate elsewhere.
Know that Finder search does not work on Synology shares. This is the single most common Mac-office complaint, and it is structural: DSM has never shipped Samba's Spotlight search backend, so Finder searches against an SMB share either crawl or quietly return nothing. No settings fix it. The workable alternatives are Synology's Universal Search in the web interface, File Station, or the Synology Drive client, which maintains its own index. And index deliberately: Universal Search indexing on a busy production share creates constant I/O, so index the folders people search and prune the rest.
Watch for filename landmines. Two classes of trouble. Characters that are illegal over SMB (backslash, colon, asterisk, question mark, quotes, angle brackets, pipe) will fail on copy; creative teams with punctuation-heavy file names hit this weekly. Subtler is Unicode normalisation: macOS composes accented characters differently (NFD) from most other systems (NFC), and files that arrive on the NAS through rsync or Linux tools can show up from a Mac as un-openable or duplicated. Files copied via Finder over SMB are safe; if you sideload with rsync, use --iconv=utf-8-mac,utf-8.
Use Windows ACLs, which is the default. DSM shared folders on Btrfs use Windows ACLs that apply consistently across SMB, File Station and Synology Drive. That is the right model for Mac teams; do not switch shares to plain POSIX permissions. Remember users need both share-level permission and ACL permission to see anything, which is the first thing to check when "I can't open the folder" tickets arrive.
Step by step: SMB for a Mac fleet
- Control Panel > File Services > SMB: enable SMB, set maximum protocol SMB3, minimum SMB2.
- Same screen: disable the AFP service tab entirely.
- SMB > Advanced Settings > Others: enable opportunistic locking, SMB2 lease and SMB3 durable handles (most are on by default; verify).
- Advanced Settings: set veto files to
/.DS_Store/._*/, after sweeping existing dot-files off the shares (dot_cleanon a Mac, or find-and-delete from File Station). - Leave server signing on Auto. Leave transport encryption on client-negotiated except for genuinely sensitive shares.
- Control Panel > File Services > Advanced: confirm Bonjour discovery is on so shares appear in Finder's sidebar.
- In Universal Search on the NAS, index only the folders people genuinely search.
- On Macs, connect via
smb://nas-name.localor the reserved IP, then drag the share into Login Items for auto-mount.
Time Machine to the NAS, without the heartbreak
Time Machine to a Synology share is the cheapest per-Mac backup there is, and set up carelessly it will absolutely eat your volume and then fail when you need it. Here is the version that survives contact with reality.
Give each Mac its own quota. Time Machine only prunes old backups when it believes the disk is full, so an uncapped Time Machine share grows until it consumes the volume. Create a dedicated TimeMachine shared folder, create one DSM user per Mac (tm-daves-mbp, tm-edit-01), and set a per-user quota on the Btrfs volume sized at roughly 1.5 to 2 times each Mac's drive. Per-user quotas beat one folder-level quota because the first Mac to back up cannot starve the rest.
Broadcast the share to Macs. Control Panel > File Services > Advanced: enable Bonjour service discovery and "Enable Bonjour Time Machine broadcast via SMB", then set your Time Machine folder under "Set Time Machine Folders". One heads-up: enabling the broadcast quietly switches on several SMB settings (SMB3, opportunistic locking, durable handles) if they were off. That is fine, since you want them anyway, but do not be surprised that your SMB config changed.
Exclude the Time Machine share from snapshots and recycle bins. Time Machine writes into constantly-churning sparsebundle images. Snapshotting that share bloats your snapshot storage for zero benefit (Time Machine is already versioned), and a recycle bin on it doubles every deletion. Disable both for the Time Machine share specifically.
The macOS 26 Tahoe problem, and the current fix. Since Tahoe, a wave of Mac users have hit BACKUP_FAILED_DISCONNECTED_DISK_IMAGE errors backing up to NAS targets: Tahoe tightened the Mac's SMB client behaviour, and long-running Time Machine sessions get their disk image yanked mid-backup. As of July 2026 Apple has not documented a fix, but the community workaround is stable and we use it on managed fleets: create /etc/nsmb.conf on the Mac with settings that pin the protocol and require signing:
[default]
protocol_vers_map=6
signing_required=yes
Then reboot (or unmount and remount the share). Note what this does: it turns signing on. That is a straight inversion of a decade of "disable signing for NAS speed" advice, and it is why we no longer recommend the old speed tweaks. Treat this as a point-in-time workaround, and retest after each macOS update in case Apple changes the behaviour again.
Verify backups, do not trust them. A backup you have never restored from is a hope, not a backup. Hold Option and click the Time Machine menu bar icon for "Verify Backups" (this works for network destinations), and perform a real test restore of a file per Mac per quarter.
For fleet-grade backup, add Active Backup for Business. Synology's ABB package backs up Macs centrally, is licence-free, and officially supports macOS 26 Tahoe. The honest caveat: restoring a Mac from ABB is not a Windows-style bare-metal restore; recovery runs through a working macOS install plus Migration Assistant. So the pairing we deploy is ABB as the centralised, IT-controlled fleet backup and Time Machine as each user's self-service file recovery. They cost nothing extra and cover each other's gaps.
Step by step: Time Machine that keeps working
- Create a
TimeMachineshared folder on the Btrfs volume. Disable its recycle bin, and exclude it from any snapshot schedules. - Create one DSM user per Mac, in a
timemachinegroup with access only to that share. - Control Panel > User & Group > (user) > Quota: set each user's quota to 1.5 to 2x that Mac's internal drive.
- Control Panel > File Services > Advanced: enable Bonjour, enable the Time Machine broadcast via SMB, and set the Time Machine folder.
- On each Mac: System Settings > General > Time Machine > Add Backup Disk, pick the broadcast share, sign in as that Mac's dedicated user.
- On macOS 26 Tahoe, deploy the
/etc/nsmb.confworkaround above if backups fail with disk image disconnection errors. - Quarterly: run "Verify Backups" from the Time Machine menu (Option-click) and restore one real file per Mac.
- Install Active Backup for Business and enrol the fleet as the second, IT-owned layer.
Ransomware resilience and real backup
A NAS is not a backup. If the only copy of your data lives on the Synology, you have centralised your risk, not reduced it. The good news is that Synology's own tooling covers the full 3-2-1 pattern (three copies, two media, one off-site) without third-party licences.
Snapshots are your ransomware undo button. Install Snapshot Replication and schedule Btrfs snapshots on every business share: hourly during work hours is a sensible default, with Smart Retention keeping hourlies for a day, dailies for a week, weeklies for a month. When a Mac gets compromised and starts encrypting files over SMB, snapshots let you roll the share back to 10:00 this morning in minutes. They are near-free on Btrfs; there is no reason not to run them everywhere except the Time Machine share.
Make some snapshots immutable. Since DSM 7.2, snapshots can be made immutable for a protection period that nobody, including administrators, can shorten or delete. That "including administrators" is the point: stolen admin credentials are exactly how modern ransomware deletes your snapshots before encrypting. It also cuts the other way, since an immutable snapshot retention set too long will eat volume space with no escape hatch. Start at 7 days on your critical shares, watch consumption for a month, then extend if you have headroom.
Replicate to a second box. Snapshot Replication to a second Btrfs Synology (in another room, or another site) gives you a warm copy with the whole snapshot history, and failover measured in minutes. Note the target must also be Btrfs, so the bargain ext4-only J-series cannot be your replication target.
Hyper Backup gets a copy off-site. Point Hyper Backup at Synology C2, Backblaze B2 (via the S3 destination, around $6 per TB per month), or a Synology at another office running Hyper Backup Vault. Enable client-side encryption, and understand what you are signing: the encryption password can never be changed, and losing it makes the backup permanently unrecoverable. Export the encryption key when the task is created and store it in your password manager, not on the NAS it protects. Then enable scheduled backup integrity checks with data verification, and calendar a quarterly test restore.
Maintenance is part of backup. A UPS connected over USB with Safe Mode set to trigger after a few minutes of outage (the goal is a clean shutdown, not riding out the powercut). Monthly quick S.M.A.R.T. tests, quarterly extended ones. Data scrubbing every three months, which on redundant Btrfs pools detects and repairs silent corruption; note scrubbing needs redundancy, so a Basic or RAID 0 pool quietly loses one of Btrfs's headline benefits. And notifications configured and tested, because every one of these protections is worthless if the drive-failure email goes nowhere.
On rack hardware, use the redundancy you paid for. If you bought an RP model, plug the two power supplies into different circuits (or a UPS and mains) so a failed PSU or a tripped breaker does not stop the NAS. For a business that cannot tolerate downtime at all, Synology High Availability pairs two identical units as an active/passive cluster over a dedicated heartbeat link: if the active box fails, the passive one takes over in minutes with the same data and address. It needs two matching units and halves your usable capacity, so it is for uptime-critical shops, not every office. And it is resilience, not backup, so you still run the full 3-2-1 stack above.
Step by step: the protection stack
- Install Snapshot Replication. Schedule hourly snapshots on business shares with Smart Retention. Exclude the Time Machine share.
- Enable immutable snapshots on critical shares with a 7-day protection period; review space use after a month.
- If you have a second Btrfs Synology, configure Snapshot Replication to it on at least a daily schedule.
- Install Hyper Backup; create an encrypted backup task to C2, Backblaze B2, or an off-site Vault. Export the encryption key to your password manager immediately.
- Enable scheduled integrity checks with data verification on the Hyper Backup task.
- Connect a UPS: Control Panel > Hardware & Power > UPS, Safe Mode after 3 to 5 minutes.
- Storage Manager: schedule monthly quick and quarterly extended S.M.A.R.T. tests, plus data scrubbing every 3 months.
- Calendar a quarterly restore test: one file from snapshots, one from Hyper Backup. Twenty minutes that validates the entire stack.
10GbE for Macs: the end-to-end version
This is where Mac creative businesses feel the biggest gains, and where the internet's advice is thinnest. A 10GbE link is ten times gigabit on paper; whether you see even half of that depends on every link in the chain: NAS port, switch, cable, Mac interface, and the drives behind it all.
The NAS end. Covered in the buying section, but to recap: most RackStations have 10GbE built in (dual ports across the xs range, and from the 12-bay RS Plus up), which is a big part of why rack is the business default. On desktop the fork is sharper: DS925+ cannot do 10GbE at all; DS1525+ takes the E10G22-T1-Mini module; DS1825+ takes full PCIe cards (dual SFP+ or 10GBASE-T, including a combo card that adds NVMe slots). SFP+ with DAC cables or transceivers runs cooler and cheaper at short range; 10GBASE-T (RJ45) reuses familiar copper cabling. Either is fine for an office; just pick one ecosystem and match the switch.
The Mac end. Every current Mac Studio has 10GbE built in. Mac mini offers it as a build-to-order option (order it that way; it cannot be added later). MacBooks need a Thunderbolt adapter, and the Sonnet Solo10G, OWC Thunderbolt 10G, and QNAP QNA-T310G1T all deliver about 9.4Gbps real-world. One important distinction: those are Thunderbolt adapters. Cheap USB Ethernet adapters run Apple's built-in class drivers, often top out well below 10GbE, and usually cannot do jumbo frames, which matters in a moment.
The middle. Cat6a cable for 10GBASE-T runs (Cat6 only manages 10GbE to about 55 metres; Cat6a does 100). For switches, small businesses generally land on the UniFi Aggregation (8 SFP+ ports), the UniFi Flex XG (10GbE RJ45, fanless, office-friendly), or QNAP's QSW range. Server-room switches like the Netgear XS508M work but sound like it.
The real bottleneck: the drives. A 10GbE network can move roughly 1,100 MB/s. A half-filled 4-bay array of spinning drives delivers perhaps 400 to 800 MB/s sequential, and far less on small files. If your transfers plateau around those numbers while iperf3 shows 9.4Gbps, the network is fine; the spindles are the ceiling.
Fixes, in order of value: more drives in the array, an all-NVMe volume for active projects (compatibility-list drives only, remember), and only then SSD caching. On that last point, an NVMe read cache barely helps video editors, because large sequential ProRes reads bypass the cache's strengths; cache shines on small-file churn like thumbnails and project indexes. For a video team, two NVMe drives as a fast working volume beats the same drives as cache almost every time.
SMB Multichannel and LACP: pick one, and probably pick neither. DSM 7.2+ supports SMB3 Multichannel (Control Panel > File Services > SMB > Advanced Settings > Others), but it requires separate NICs with individual IPs and is mutually exclusive with link aggregation, so a bonded LACP pair must be unbonded to use it. Meanwhile macOS's multichannel support defaults to failover rather than aggregation, picking the single fastest link, and reliability reports on Apple Silicon remain mixed.
LACP, for its part, never speeds up a single client; it only helps many clients in aggregate. The honest recommendation for a Mac office: give the NAS and the heavy Macs one fast 10GbE link each and skip the link-combining cleverness entirely.
Step by step: 10GbE rollout
- Confirm the NAS supports 10GbE (see the buying section) and fit the module or card.
- Wire the NAS and heavy-workstation Macs into a 10GbE switch with Cat6a (or SFP+/DAC).
- MacBooks get Thunderbolt 10GbE adapters, not USB ones.
- Prove the network first: run iperf3 between a Mac and the NAS (install it on the NAS via Container Manager with host networking, otherwise you benchmark Docker's NAT instead of the NIC). Expect around 9.4Gbps.
- Then test real SMB copies with a large file. 700 to 1,100 MB/s means everything is working against a fast array; 400 to 800 MB/s with clean iperf3 means the drives are the ceiling, not the network.
- If the array is the bottleneck: add spindles or move active projects to an NVMe volume before touching any network tuning.
Jumbo frames and MTU 9000: the honest version
Every 10GbE guide eventually says "enable jumbo frames", and most hand-wave the details. We have tested MTU 9000 on real all-wired Mac-to-Synology networks, and the honest answer has two halves: on a segment you fully control, the speed difference is real and worth having. On a mixed network, it is the fastest way to break file sharing in ways that are miserable to diagnose.
What it is. Standard Ethernet frames carry 1,500 bytes (MTU 1500). Jumbo frames raise that to 9,000, meaning fewer packets and less per-packet overhead for bulk transfers. On paper, free performance.
What we see in practice. In our own testing on fully wired 10GbE segments, jumbo frames deliver a substantial jump in sustained SMB throughput on large files, which is exactly the workload creative teams care about. Published benchmarks are contradictory (some show single-digit gains, some show MTU 9000 slower than 1500), and the difference is usually the network being tested: the benefit collapses the moment any hop in the path is misconfigured.
Why we still tell mixed offices to leave it alone. The failure mode is uniquely horrible: MTU must match on the NAS and every Mac, and every switch in the path must pass large frames. One forgotten 1500 device produces the classic mixed-MTU signature: pings work, small files copy, and large transfers hang or die silently. Wi-Fi clients are permanent 1500 hops. Most USB Ethernet adapters on Apple Silicon cannot do jumbo at all. And if a spinning-drive array is your bottleneck, jumbo frames speed up the part that was not the problem.
When it is worth it. A fully wired, fully inventoried segment you completely control, where the NAS and the 10GbE Macs move very large sequential files all day. If that is you, the gain justifies the setup discipline. Here is how to do it properly, in the only order that avoids cutting yourself off:
- Switch first. Enable jumbo frames on the switch (UniFi: Settings > Networks, Jumbo Frames toggle, which sets 9216). Switch MTU only needs to be greater than or equal to the endpoints, so 9216 against endpoint 9000 is correct, not a mismatch.
- NAS second: Control Panel > Network > Network Interface > select the 10GbE interface > Edit > "Set MTU value manually" > 9000. Fair warning: applying this restarts network services and drops active SMB sessions, so do it out of hours.
- Macs last: System Settings > Network > select the 10GbE service > Details > Hardware > Configure: Manually > MTU: Custom > 9000. Or from Terminal:
networksetup -setMTU en0 9000(substitute your interface). - Now verify, and note the Mac-specific trap: the textbook test everyone copies from Linux guides,
ping -D -s 8972 <nas-ip>, fails on macOS with "message too long" even when jumbo frames are working perfectly, because macOS caps raw ping payloads at 8,192 bytes. Useping -D -s 8184 <nas-ip>instead; if that returns replies with the don't-fragment flag set, your path is passing jumbo frames. - Re-run iperf3 and a real large-file copy. On a properly configured all-wired segment you should measure a clear improvement on sustained transfers. If you did not, something in the path is still at 1500: find it, or set everything back to 1500 rather than living with a half-converted network.
The condensed checklist
For the version you can run down in a maintenance window:
Day one: named admin only, QuickConnect skipped, SHR + Btrfs, per-team shares with recycle bins, groups-based permissions, DHCP reservation, auto-updates on, notifications tested.
Security: 2FA enforced for all, Auto Block + Account Protection + DoS protection on, firewall default-deny with LAN/VPN allows, ports changed with HTTPS + HSTS forced, Let's Encrypt certificate, AFP/NFS/FTP/Telnet off, Tailscale for remote access, Security Advisor scheduled.
Mac sharing: SMB3 max / SMB2 min, veto files for .DS_Store, signing on Auto, Bonjour on, Universal Search indexing pruned, ACL + share permissions both checked.
Time Machine: dedicated share, one DSM user and quota per Mac, broadcast via SMB enabled, snapshots and recycle bin off for that share, Tahoe nsmb.conf workaround where needed, quarterly verify and restore test, ABB alongside.
Protection: hourly snapshots with Smart Retention, immutable snapshots (7 days) on critical shares, replication to a second Btrfs box, encrypted Hyper Backup off-site with the key in your password manager, UPS + S.M.A.R.T. + scrubbing scheduled, quarterly restore drills.
Networking: RackStation with built-in 10GbE for most businesses (desktop DS1525+ or DS1825+ where there is no rack, never the DS925+ for 10GbE), Thunderbolt adapters for MacBooks, iperf3 before blaming anything, drives upgraded before networks tuned, jumbo frames on segments you control end to end (they are worth it there) and 1500 everywhere else.
If you would rather hand the whole thing to people who do this weekly, this is exactly the kind of infrastructure work we do for Mac-based businesses across London: design, security hardening, migration off ageing servers, and the ongoing management that keeps a NAS boring. Get in touch and we will take a look at what you are running.
Frequently asked questions
- Should Mac users connect to a Synology NAS with AFP or SMB in 2026?
- SMB, without exception. Apple removed the AFP server from macOS back in Big Sur and formally deprecated the AFP client in macOS 15.5, stating it will be removed in a future release. Synology's own documentation recommends disabling AFP and using SMB for macOS clients. Time Machine has supported SMB since macOS Sierra, so there is no remaining reason to run AFP. Disable the AFP service on the NAS and standardise on SMB3.
- Are jumbo frames (MTU 9000) worth it on a 10GbE network with Macs?
- Yes, if and only if you control every hop. In our testing on fully wired Mac-to-Synology 10GbE segments, MTU 9000 delivers a substantial improvement in sustained transfer speeds on large files. But every device in the path must cooperate: one Wi-Fi client, router hop, or USB Ethernet adapter stuck at 1500 produces the classic mixed-MTU failure, where small transfers work and large ones hang. Set the switch first, then the NAS, then every Mac, and verify from a Mac with ping -D -s 8184. On mixed or partly wireless networks, keep everything at 1500.
- Why does Time Machine keep failing to a Synology NAS on macOS 26 Tahoe?
- macOS 26 Tahoe tightened the Mac's SMB client behaviour, and many users hit repeated BACKUP_FAILED_DISCONNECTED_DISK_IMAGE errors against NAS targets. As of July 2026 the reliable community fix is an /etc/nsmb.conf file on the Mac that pins SMB 3 and requires signing, which aligns the client with the NAS. Note this inverts older advice: the fix enables signing rather than disabling it. Apple has not documented the change, so treat this as a current workaround and retest after each macOS update.
- Which Synology models support 10GbE for a Mac office?
- On RackStations, usually built in. The xs and xs+ range (RS3621xs+, RS3626xs, RS4826xs+, RS6426xs+, and the short-depth 1U RS1626xs+) all ship dual 10GbE, and RS Plus models from the 12-bay RS2423+ up have it built in too. For most businesses with a comms room that is the whole answer: pick a RackStation and 10GbE comes with it. On desktop DiskStations it is patchier. The DS925+, the default 4-bay pick, has no 10GbE upgrade path at all, since Synology removed the slot its predecessor DS923+ had. For 10GbE on desktop you need the DS1525+ (E10G22-T1-Mini module) or the DS1825+ (PCIe card). Check the specific model's spec sheet before buying, not the product family.
- Can I use non-Synology hard drives in a 2025 Synology Plus NAS?
- Yes, since DSM 7.3. Synology's April 2025 policy blocked storage pool creation with non-validated drives on the 2025 Plus models, but the backlash led Synology to reverse it in DSM 7.3 (October 2025). Third-party 3.5-inch hard drives and 2.5-inch SATA SSDs now work again, though they show an 'unverified' label and lose some health analytics. The reversal does not extend to M.2 NVMe: storage pools on NVMe drives still require models on Synology's compatibility list.
- Is a Synology NAS fast enough for video editing on a Mac?
- Yes, with the right build. The network is rarely the limit: a 10GbE link moves roughly 1,100 MB/s, comfortably enough for multi-stream ProRes work. The usual bottleneck is the drive array, since a part-filled 4-bay of spinning drives delivers perhaps 400 to 800 MB/s sequential. For editing teams we spec more drive bays or an NVMe volume for active projects, connect the Macs over wired 10GbE, and enable jumbo frames on that controlled segment. Model choice matters too: the DS925+ cannot take 10GbE at all, so start from the DS1525+ or DS1825+.
- Why is Finder search slow or empty on a Synology share?
- Because DSM has never shipped Samba's Spotlight search backend, Finder has nothing to query on the server, so it either crawls the share slowly or returns nothing. No SMB setting on the NAS or the Mac fixes this. The workable alternatives are Synology's Universal Search in the DSM web interface, File Station, or the Synology Drive client, which maintains its own index. Index only the folders people genuinely search, because indexing busy production shares creates constant background I/O of its own.
- Is QuickConnect safe enough for business remote access to a Synology NAS?
- It is not the horror story some forum threads suggest. QuickConnect is a relay, so it opens no ports on your firewall, and it is safer than port forwarding. But it does expose your DSM login page through Synology's infrastructure, protected only by your account credentials and 2FA. For a business we recommend skipping QuickConnect and using Tailscale, which has an official package in Synology's Package Center, creates a WireGuard-based private network with no exposed login page, and takes about ten minutes to set up.